Pages

Friday, July 27, 2012

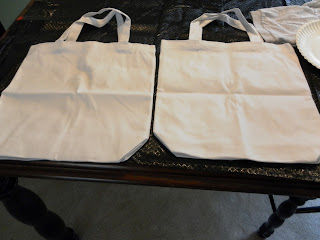
Apple Canvas Bag


Apple Canvas bags

What you need:
Canvas bag
Paint
Apple

I was making gift bags for a birthday party and thought it would such a cute idea to make the bags have double duty. 


So I had an apple that was just over ripe.


 I cut it in half. I mixed green paint with white to lighten it, and green paint with a mixture of purple, red, orange to darken it. You can’t tell in the photos but there are two different color greens on the canvas. I just started on the bottom of the bag, and did every other in light green then dark green. 

 
I did notice later that the paint had gone though the bag to the inside. It didn’t go though the back, but just inside. So maybe I’d use a plastic bag inside just to make sure next time. Happy crafting!

Sunday, July 15, 2012

Easy Home Decor

This is a very easy way to cover some bear wall.


You just need:
4 12x12 pieces of scrapbook paper
4 empty card bottom boxes
Scissors
Tape
Pencil
12” paper cutter

The box is 7.5” x 5.25”. So I cut the paper down to 11.5” x 9.25” to make sure I had more than enough to fold into the box. On each corner cut out a 2” x 2” square so it looks like this:


Put the box in the middle and fold over all of the edges on the paper around the box. This will help after taping to get everything on the box smoothly.


Next apply the tape to the scrapbook paper. Begin putting the scrapbook paper around the box. Repeat until all of your boxes are covered. Here’s my end product:


Wednesday, July 11, 2012

Grilled Chicken Nachos

 Ingredients:
Chicken tenders or breasts- boneless skinless
1 jar of salsa
1 packet of taco seasoning
1 small can of green chilies- drained
1 can of black beans – rinsed and drained
1 package of Mexican shredded cheese
Green onions
Tortilla chips

Directions:
While the chicken is frozen (in the am) put it in the crockpot. Mix ½ the taco seasoning with ¾ the jar of salsa- pour over the chicken and cook on high for about 5 hours if you’re using chicken breasts (only 2-3 for chicken tenders). Once the chicken is literally falling apart, pour the chilies, beans and remaining taco seasoning into the crockpot. Cover the bottom of a disposable aluminum pan with tortilla chips. Top with chicken mixture, shredded cheese and finely chopped green onions.

Heat the grill, place aluminum foil over the top of your pan, place on the grill for about 10min or until the cheese is melted. Enjoy this super unhealthy but ridiculously tasty dinner! ;)


Thursday, July 5, 2012

Mustaches for Daddy


store to find something for him. Before we walked into the store I asked the boys, “What would you like to get daddy for his birthday?” Agent J responded quickly and quite seriously, “Mustaches. Because daddy can’t grow one for himself.”

We searched high and low at two different stores for fake mustaches only to find nothing. Then it came to me, “I’m crafty! Let’s make ‘em” So I picked up some black pipe cleaners and elastic. When bubba was down for a nap one afternoon the twins and I sat at the kitchen table laughing hysterically, enjoying being creative together and imagining daddy wearing these ridiculous mustaches!

It was so much fun! If you have boys, then you probably understand the fascination with facial hair. My sons have always been a little over the top with it (at age two they wanted me to draw mustaches on them to go to the store and to see their grandfathers band… we allowed it too! You’re only a kid once!) Here’s what we did- have a great time and enjoy some laughs with your little ones!

Need:
·      Scissors
·      Pipe cleaners
·      Elastic string
·      Imagination

Instructions:
·      Manipulate the pipe cleaner(s) into the shape of the mustache you’d like
·      Tie the elastic string around the middle of the mustache in a knot
·      Measure around the wearers head with the elastic and tie another knot in the back
·      Enjoy the ridiculousness of these home made mustaches “because daddy can’t grow one for himself”


Tuesday, June 26, 2012

Bathroom update


I wanted to "re-do" the guest bath in my home. I wanted to make it more little girlish for my little girl. I took photos of the before and after. I'm still working on over the toilet things, but it will be done soon!! So excited for this room in the house to be 90% done.


I bought a rug with flowers on it and was inspired to paint something similar on a canvas for the wall. I had a coupon for Michael’s so I went to look at what they had. I got a two pack of large canvas for $5.49!! My coupon was a 50% off!! So I came home and started painting. I made the flowers similar to the rug. 


The bird canvas I came up with from another blogger. I saw what she did on Pinterest and fell in love with it, and knew I could do something similar. (http://ashleyannphotography.com/blog/2010/01/13/diy-paper-bird-painting/). My version is a little different as I added my own flair. I used a pencil to draw out what I wanted. I picked out the paper I wanted from my scrap book supplies. Put Mod Podge on the back of the leaf's and the bird and then on top also making sure you get all the bubbles out. If your paper smear's you can touch up the canvas with a little white paint. I was lucky and didn't have to do that. I also don't have a brown paint, so I had to mix my own.  Paint on your twigs and then seal the canvas with your mod podge. 


Hang and enjoy! I am really enjoying the new look in the bathroom!

Making a simple skirt


Materials:
3/4 elastic about 21inches long
fabric (about 1/2 yard) for the skirt and the hem. Opposite or similar fabrics are cute.

Skirt sizes...
For an 8yr old she had it total 17inches long, and 21 inches in the waist.


ALWAYS make sure you wash and dry your fabric before you cut or sew it together!!! This will help the material preshrink and your sewing more accurate.


Take your fabric and fold right sides (meaning the sides you want on the outside. So your skirt will be inside out) together (you do this because you need a piece for the front and one for the back) measure 16” long and 21” wide. Cut out your skirt. 


On the opposite fabric (fabric for the hem) place face together and measure 22” long and just 2.5” wide. Cut out for your hem. You again will need a two pieces this length to have a hem for the back and the front.


On the hem iron a small amount about ¼” over and run though your machine with just a basic stitch. Do this for both pieces. 


Pin the skirt together inside out along the sides. Next pin the hem to the bottom of the skirt, about ¼” to ½” into the skirt. The hems will be a little longer on each side and this will allow you to have extra on either side so there isn't a sewing mistake. You can cut the extra off later. Also, pining the hem on now will allow you to make sure it is even around the skirt and one side isn't longer then the other. 


When its all pinned together using your zigzag stitch sew the sides together all the way though the hem. Sew close to the edge about ¼” from the edge of the fabric.


Using the basic stitch again sew the hem onto the bottom of the skirt. 


Next you need to iron over about 1” from the top. This is for the elastic. Having ¾” elastic and 1” fold over you have about ¼” to sew and have a little extra room. Use your basic stitch again and start at one of the edges (seams). Go all the way around leaving about 1-1 ½” open at the end. Use a safety pin at the end of your elastic pushing it though the top of the skirt. When you get to the end and both sides are out sew them both together. I use a zigzag stitch. Now close your hole opening and sew an extra line right on the seam of one of the hips to keep the elastic in place and it won't roll over on you.


You have now made a simple skirt from just a little fabric. Happy sewing!!

Homemade Brown Sugar & Vanilla Body Scrub


I found the recipe on a blog (http://www.bystephanielynn.com/2010/05/my-favorite-vanilla-brown-sugar-body.html) through Pinterest. I was searching for something I could make for my mom and mother-in-law for Mother’s Day. My husband was convinced that his mother would have no idea what this was and would try to bake with it. I wasn’t so sure, thinking every girl knows what body scrub is and we know how to use it. Also knowing with confidence I wouldn’t have to tell my mother what it was.

Here’s how you make it.

Take 2 cups of packed brown sugar and mix with 1 cup of white sugar until there are no clumps.


Add 1 cup of Sunflower Oil and 1 tbsp of vanilla. Mix well. Put into a sealable container.


It looks like a whole lot dry, but shrinks a lot when the oil is added. I bought my containers and scoops (I just bought a single small spoon) from Bed, Bath & Beyond and used a coupon.

Because these were gifts I wanted to make them a little more personal. I recently purchased a Cricut machine and some sticky vinyl. I cut a small piece of the vinyl off the roll and stuck it to the Cricut cutting mat.


Using the Stork’s Delivery cricut cartridge from Creative Memories, I cut out 2 ½” letters of our mother’s first initials. I also found a little embellishment to cut out as well to add a little decoration. I then placed them on the container.


Here’s the close to finished product (I added more the body scrub after this picture was taken). One complete recipe of the body scrub filled one of my containers, so I had to repeat the recipe to make the other gift.


So, when I gave my mother-in-law this gift, she knew exactly what it was no question. I gave my husband that “I told you so” look and we had a good chuckle. I ended up not seeing my mother to give her gift in person, but I left it at her house to open when she got home. A week later she sent me a text message asking what it was. Proving my theory of every girl knowing what it was, false. So funny.