Pages

Tuesday, June 26, 2012

Bathroom update


I wanted to "re-do" the guest bath in my home. I wanted to make it more little girlish for my little girl. I took photos of the before and after. I'm still working on over the toilet things, but it will be done soon!! So excited for this room in the house to be 90% done.


I bought a rug with flowers on it and was inspired to paint something similar on a canvas for the wall. I had a coupon for Michael’s so I went to look at what they had. I got a two pack of large canvas for $5.49!! My coupon was a 50% off!! So I came home and started painting. I made the flowers similar to the rug. 


The bird canvas I came up with from another blogger. I saw what she did on Pinterest and fell in love with it, and knew I could do something similar. (http://ashleyannphotography.com/blog/2010/01/13/diy-paper-bird-painting/). My version is a little different as I added my own flair. I used a pencil to draw out what I wanted. I picked out the paper I wanted from my scrap book supplies. Put Mod Podge on the back of the leaf's and the bird and then on top also making sure you get all the bubbles out. If your paper smear's you can touch up the canvas with a little white paint. I was lucky and didn't have to do that. I also don't have a brown paint, so I had to mix my own.  Paint on your twigs and then seal the canvas with your mod podge. 


Hang and enjoy! I am really enjoying the new look in the bathroom!

Making a simple skirt


Materials:
3/4 elastic about 21inches long
fabric (about 1/2 yard) for the skirt and the hem. Opposite or similar fabrics are cute.

Skirt sizes...
For an 8yr old she had it total 17inches long, and 21 inches in the waist.


ALWAYS make sure you wash and dry your fabric before you cut or sew it together!!! This will help the material preshrink and your sewing more accurate.


Take your fabric and fold right sides (meaning the sides you want on the outside. So your skirt will be inside out) together (you do this because you need a piece for the front and one for the back) measure 16” long and 21” wide. Cut out your skirt. 


On the opposite fabric (fabric for the hem) place face together and measure 22” long and just 2.5” wide. Cut out for your hem. You again will need a two pieces this length to have a hem for the back and the front.


On the hem iron a small amount about ¼” over and run though your machine with just a basic stitch. Do this for both pieces. 


Pin the skirt together inside out along the sides. Next pin the hem to the bottom of the skirt, about ¼” to ½” into the skirt. The hems will be a little longer on each side and this will allow you to have extra on either side so there isn't a sewing mistake. You can cut the extra off later. Also, pining the hem on now will allow you to make sure it is even around the skirt and one side isn't longer then the other. 


When its all pinned together using your zigzag stitch sew the sides together all the way though the hem. Sew close to the edge about ¼” from the edge of the fabric.


Using the basic stitch again sew the hem onto the bottom of the skirt. 


Next you need to iron over about 1” from the top. This is for the elastic. Having ¾” elastic and 1” fold over you have about ¼” to sew and have a little extra room. Use your basic stitch again and start at one of the edges (seams). Go all the way around leaving about 1-1 ½” open at the end. Use a safety pin at the end of your elastic pushing it though the top of the skirt. When you get to the end and both sides are out sew them both together. I use a zigzag stitch. Now close your hole opening and sew an extra line right on the seam of one of the hips to keep the elastic in place and it won't roll over on you.


You have now made a simple skirt from just a little fabric. Happy sewing!!


Homemade Brown Sugar & Vanilla Body Scrub


I found the recipe on a blog (http://www.bystephanielynn.com/2010/05/my-favorite-vanilla-brown-sugar-body.html) through Pinterest. I was searching for something I could make for my mom and mother-in-law for Mother’s Day. My husband was convinced that his mother would have no idea what this was and would try to bake with it. I wasn’t so sure, thinking every girl knows what body scrub is and we know how to use it. Also knowing with confidence I wouldn’t have to tell my mother what it was.

Here’s how you make it.

Take 2 cups of packed brown sugar and mix with 1 cup of white sugar until there are no clumps.


Add 1 cup of Sunflower Oil and 1 tbsp of vanilla. Mix well. Put into a sealable container.


It looks like a whole lot dry, but shrinks a lot when the oil is added. I bought my containers and scoops (I just bought a single small spoon) from Bed, Bath & Beyond and used a coupon.

Because these were gifts I wanted to make them a little more personal. I recently purchased a Cricut machine and some sticky vinyl. I cut a small piece of the vinyl off the roll and stuck it to the Cricut cutting mat.


Using the Stork’s Delivery cricut cartridge from Creative Memories, I cut out 2 ½” letters of our mother’s first initials. I also found a little embellishment to cut out as well to add a little decoration. I then placed them on the container.


Here’s the close to finished product (I added more the body scrub after this picture was taken). One complete recipe of the body scrub filled one of my containers, so I had to repeat the recipe to make the other gift.


So, when I gave my mother-in-law this gift, she knew exactly what it was no question. I gave my husband that “I told you so” look and we had a good chuckle. I ended up not seeing my mother to give her gift in person, but I left it at her house to open when she got home. A week later she sent me a text message asking what it was. Proving my theory of every girl knowing what it was, false. So funny.

Jell-O Cake


This cake my mom has made for her children for as long as I can remember. It’s definitely my most favorite cake and I know I asked for it every year for my birthday. It’s called a Jell-O Cake.

This cake is very easy to make. The ingredients are:
1 white cake mix
1 box of Jell-O – any flavor
1 tub of cool whip

Make the cake as normal. While the cake is cooling on the stovetop, start making the Jell-O.

Once the Jell-O is mixed and dissolved, poke holes all over the cake.


After the holes are poked, pour the Jell-O all over the cake.


Then I place the cake in the refrigerator. I usually let the cake sit for a few hours before serving. Once you are ready to serve, top the cake with the tub of cool whip. Enjoy this deliciously moist and light cake.

Less than $6 DIY Hanging Flower baskets


I wanted to get some hanging flower baskets for my front porch. A coworker was going to a flower sale and I mentioned to her to check the price of the flower baskets. She did, to which I was thankful, but I was even more thankful when she told me that she made her own flower baskets for $5. What, 5 dollars?! Really?! Of course I inquired. Then off to Wal-Mart I went.

You can do it for less than what I did, as I didn’t buy the cheapest flowers they had, but I still got it done for under $6, which I thought was also really good.

This is what I bought:


I didn’t have anything on hand, so I had to buy everything. Here’s the price breakdown:

$2.74 for a hanging basket
$1.28 for each set of flowers – there are 6 in a set (I bought two sets for each basket)
$.97 for a small bag of potting soil
$1.00 for a set of 5 hooks

This comes out to $5.74 per flower basket. Next year will be even cheaper, when all I have to do is replace the liner of the basket ($.99), buy flowers and more potting soil.


First, I poured a little of the potting soil in the bottom of the basket.


Second, I took all 12 of the flowers and placed them in a basket.


Third, I filled in the cracks with more potting soil. Water and your done.


Chocolate Covered Smores


Where I work we have this “rule” that if it’s your birthday you bring in a birthday treat for everyone in the office. This year I couldn’t decide between two treats. One is my favorite that I grew up on (see blog on Jell-O Cake) and the other I found on Pinterest and it looked delicious.

The other dessert I made I was inspired from a blog (http://www.tipjunkie.com/smores/) via Pinterest. It’s chocolate covered Smores. I love Smores and when I saw these I just had to make them.

You will need the following ingredients:
Graham crackers
Large marshmallows
Chocolate chips
Melting chocolate (I used Almond Bark)
Sprinkles (optional)

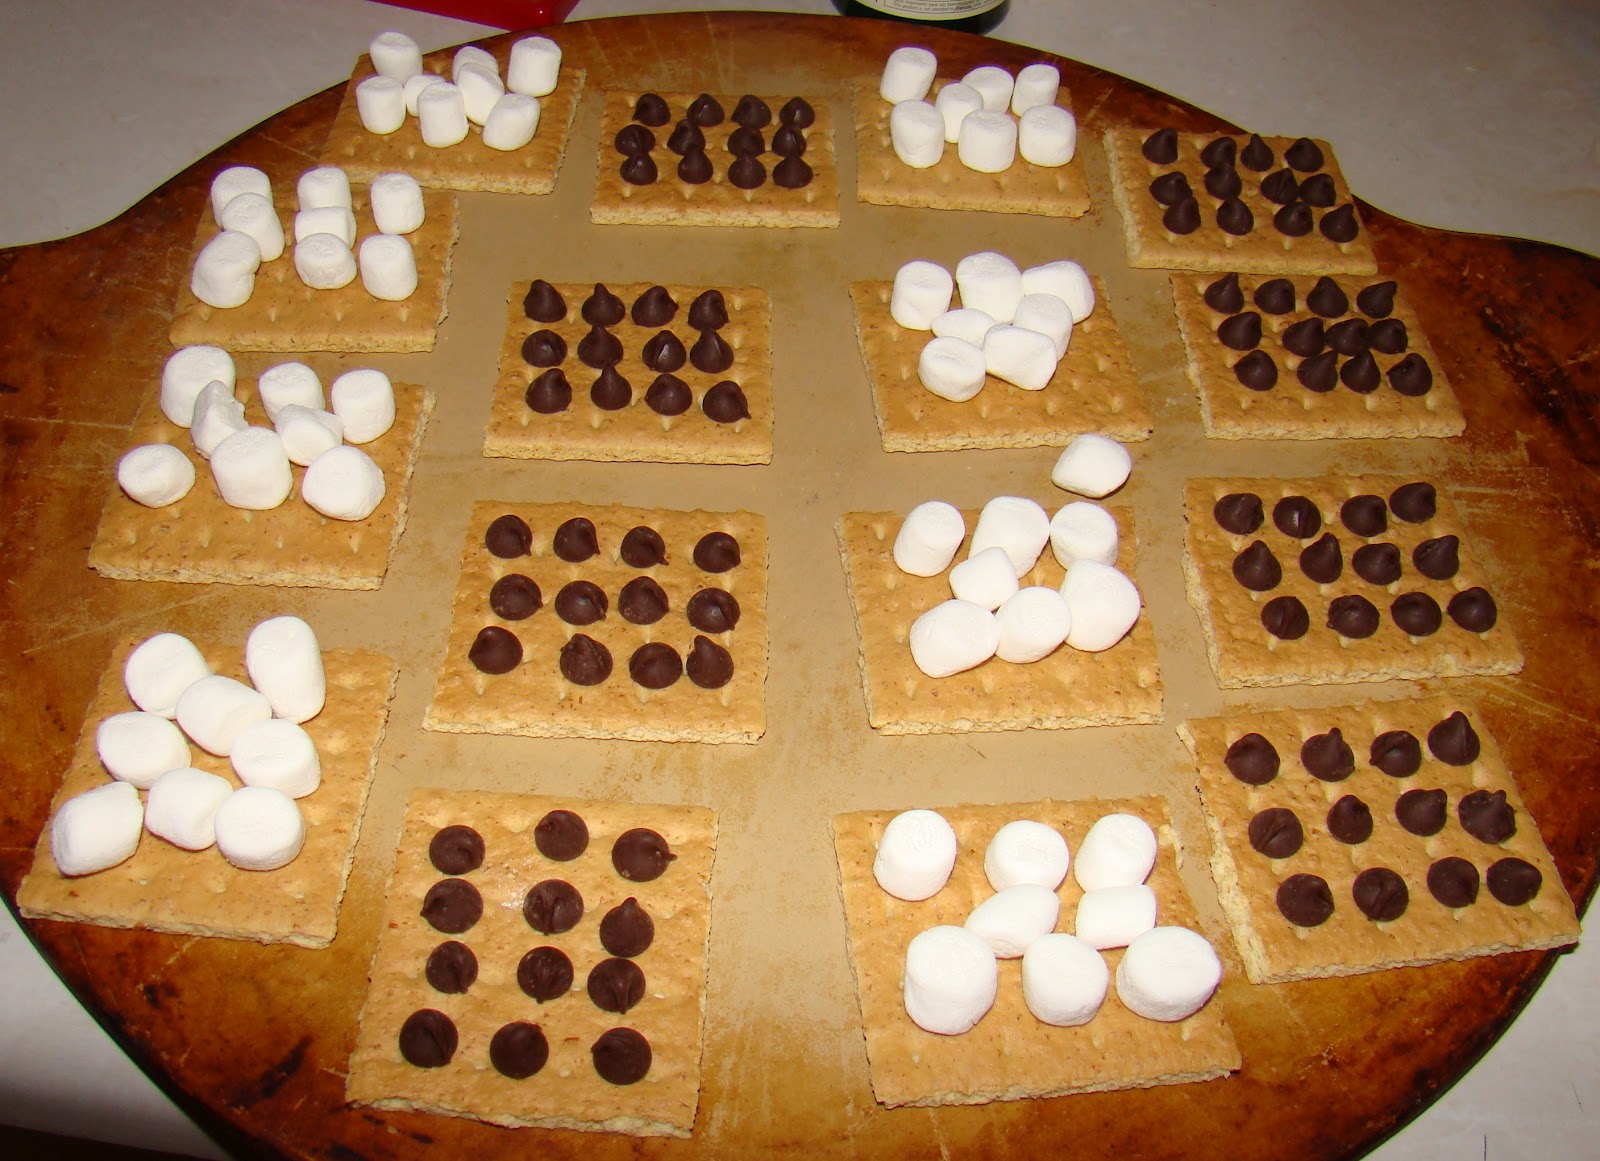
Preheat the oven to 400*. Place the graham crackers out on a cookie sheet. Put a marshmallow on half of the graham crackers. (I used mini marshmallows as that was what I had in the house at the time. Worked fine, but next time I will be using the larger marshmallows). The other half of the graham crackers lay out chocolate chips. I put about 12 chips on each cracker.


Place in the oven until the marshmallows are the desired brown – about 5 minutes. When you take them out of the oven, immediately combine the chocolate chip crackers to the marshmallow crackers and press down. Then place the Smores onto another cookie sheet and place in the freezer for about 5 minutes. This allows for the Smores to set and it makes it easier to dip in the chocolate.

Melt the almond bark and dip the crackers from the freezer to cover about half of the cracker. Place on wax paper and if desired put some sprinkles on the chocolate. Let the chocolate harden. Enjoy!


Monday, June 25, 2012

String Art

I get so inspired by pinterest and seeing everyone’s creativity come to life! Here is my interpretation of beautiful string art for the bedroom, living room or wherever.

What you need:
            Nails
            3 Wooden blocks (Michaels- $1)
            Hammer
          Spray Paint (Walmart $1)
            Sissors
            Tape
            Computer and printer
            Colored string of your choosing
           
What you do:
1.    Spray paint the blocks making sure to follow the directions listed on the back of the can. I did two coats front and back and was happy with the coloring.
2.    Go onto your computer and find a font in word (or whatever you use for documents) that you want to use for the letters. I used “Apple Chancery”.
3.    Being as this was for my parents, I needed an “A” , “J” and a “+”. Type the letters that you need and either the “+” or the “&”. Whichever you choose.
4.    Print out these letters in the size that best fits the blocks you bought.  And cut them out.
5.    Using tape, adhere the letters to the blocks in the center.
6.    Using the nails, begin to hammer them in around the letters. Don’t worry about nailing over the tape! It’ll tear right off!
7.    Pull the paper and letters off the blocks.
8.    Beginning in one of the corners of the letters, tie the string around one of the nails. Outline the letter first by twisting it around each nail once and moving on to the next nail. After you go around the whole letter once, begin to connect the nails with the string creating either a pattern or a more random look. 
9.    Tie off at another corner and cut the access string.
10. Repeat this for the other two blocks
11. Enjoy your beautiful new string art!